Keg Coupler Diagram: Essential Guide for Setup and Operation

Navigating the world of draft beer systems can be tricky, especially when it comes to understanding the different components. One key part of any draft beer system is the keg coupler. A keg coupler is a valve that connects the gas line and beer hose to your keg, allowing you to pour a perfect pint every time. Knowing how to choose, set up, and maintain the right keg coupler for your system is crucial.
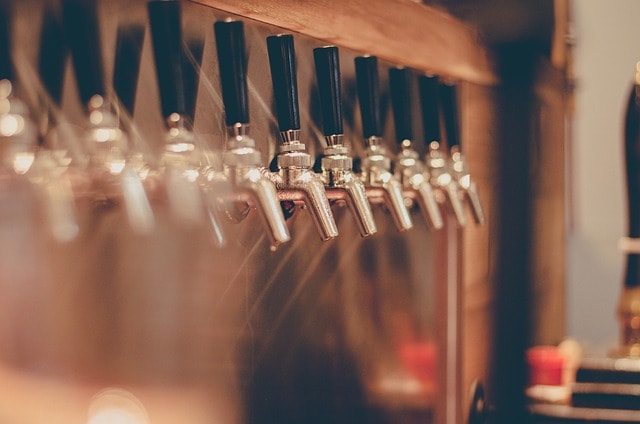
Imagine having the ability to effortlessly connect your keg and begin serving ice-cold beer in minutes. That’s where a well-detailed keg coupler diagram comes in handy. By clearly showing each part of the coupler and how it fits into your system, these diagrams can be an invaluable tool for both beginners and seasoned enthusiasts.
With the right diagram and a bit of know-how, troubleshooting common issues becomes much easier. From cleaning to maintenance, having a clear guide helps ensure your draft beer system runs smoothly, delivering fresh, tasty beer every time.
Key Takeaways
- A keg coupler connects gas and beer lines to your keg.
- Diagrams are helpful for setting up and troubleshooting.
- Proper maintenance ensures consistent beer quality.
Understanding Keg Couplers
Keg couplers are essential for connecting kegs to draft beer systems, ensuring beer flows out smoothly. This guide covers the different types of keg couplers and their key components.
Types of Keg Couplers

Keg couplers come in various types designed for specific keg valves. The most common types include:
- D Coupler: Known as the Sankey Coupler, it is widely used in the U.S. and fits most domestic brand kegs.
- S Coupler: This is often called the European Sankey. It works with many European beer brands.
- A Coupler: Often found in breweries in Germany, the A System coupler fits certain German kegs.
- U Coupler: This coupler is used for beers like those from Guinness, fitting the U System kegs.
- G Coupler: Commonly used in the UK, the G System fits specific European brands.
- M Coupler: This type is less common but is needed for certain German beers.

Using the right coupler type is crucial for ensuring a proper seal and avoiding leaks.
Key Components of a Keg Coupler
A keg coupler has several important parts:
- Keg Valve: This is the entry point on the keg where the coupler attaches.
- Probe: Found inside the coupler, it allows beer to flow out and gas to enter.
- Check Valve: Prevents beer from flowing backwards into the gas line.
- Hex Nut: Keeps the coupler securely attached to the keg.
- Handle: Used to engage and lock the coupler onto the keg valve.
- Here's a Video on the D and S Keg Coupler
Understanding these components is important for maintaining and troubleshooting your draft beer system. Cleaning is essential; make sure to disassemble and soak the coupler parts, following the steps in this guide.
By mastering the different types and components of keg couplers, users can ensure they always serve beer efficiently and effectively.
Setting Up Your Draft Beer System
Successfully setting up a draft beer system involves installing the necessary components and correctly connecting the keg coupler. Owning your own kegerator is essential for home bars and man caves, as it enhances the home brewing experience by cooling and dispensing beer. Specific tools and parts are needed, such as beer and gas lines, a regulator, and a kegerator.

Installation Process
Begin by setting up the kegerator. It usually comes with a plug covering the hole where the draft tower will be installed. Remove this plug using your hand or a flathead screwdriver.
Next, align the circular gasket holes of the draft tower with the screw holes on top of the kegerator fridge. Secure the draft tower to ensure it is firmly in place.
It is important to have replacement parts for maintaining and repairing the draft beer system. These parts ensure confident performance and can be found on our website.
Attach the beer line to the bottom of the draft tower and run it through to the kegerator. Fasten one end of the beer line to the keg coupler. Attach the gas line to the regulator, a device that controls the pressure in the CO2 cylinder or nitrogen tank.
Once these steps are completed, connect the gas line to the keg coupler.
Connecting the Coupler to the Keg
Start by locating the washer on the keg coupler. Make sure it is in good condition to prevent leaks. Next, align the coupler with the system valve on the keg and secure it by twisting it into place.
Open the pressure relief valve on the keg coupler. This step releases any built-up pressure inside the keg.
Next, connect the gas line securely to the port on the keg coupler. Make sure the CO2 cylinder or nitrogen tank is properly connected and the regulator is adjusted to the correct pressure setting. This allows the gas to push the beer from the keg through the beer line.
Finally, test the system by pulling the draft faucet to ensure beer flows smoothly from the tap. Adjust the regulator as needed to maintain the desired pressure level for optimal beer flow.
For a detailed visual guide, refer to KegWorks’ step-by-step assembly guide.
The Science of Dispensing Beer
Dispensing beer involves using gas pressures to push the liquid from the keg to the tap. This ensures each pour is perfect, with the right amount of carbonation and minimal foam.
CO2 and Nitrogen Pressures
CO2 (carbon dioxide) is commonly used to push draft beer from the keg to the tap. This gas impacts the beer’s carbonation, which affects its taste and texture. For some beers, especially stouts, a mix of CO2 and nitrogen is used. Nitrogen creates smaller bubbles, resulting in a smoother, creamier head.
The pressure exerted by these gases is crucial. A CO2 regulator adjusts the pressure, making sure it is neither too high nor too low. High pressure can cause foamy beer, while low pressure can result in flat beer. Using the correct gas and pressure ensures the beer maintains its intended flavors and mouthfeel from keg to glass. Additionally, the tap handle, a lever attached to the draft beer faucet, facilitates the pouring of beer by allowing users to easily open and close the faucet.

Maintaining Optimal Serving Pressure
To serve draft beer correctly, maintaining optimal serving pressure is essential. The desired pressure varies depending on the type of beer. Lighter beers typically require lower pressures, while heavier ales may need higher settings.
A pressure gauge helps monitor and maintain this serving pressure. Regular checks and adjustments ensure the beer remains consistent throughout the keg's life. Keeping the pressure within the optimal range avoids common problems like excessive foam or flat beer. By using the right tools and settings, bartenders can guarantee each pour is just right for customers. Adjusting the pressure correctly also prolongs the beer's freshness and quality.
Troubleshooting Common Issues
When dealing with keg couplers, common issues often include foam, leaks, and pressure problems. Proper maintenance and troubleshooting can help ensure smooth operation.
Resolving Foam and Leakage
Foam and leaks are frequent problems with keg couplers. Foam issues usually stem from improper temperature or pressure settings. Ensure the keg is kept at the recommended temperature of 38°F. Check the probe seal and washer for wear and tear, as damaged seals can cause air leaks, leading to foam.

Leakage can be due to poorly fitting components. Make sure to lube the O-rings and seals regularly. The check ball should move freely; if it's stuck, it can cause leaks. Inspect all connections and tighten them as needed. Regular cleaning is crucial to avoid buildup that might lead to leaks.
Handling Pressure Problems
Pressure issues can disrupt the dispensing process. If the beer is pouring too slowly or too fast, check the regulator settings. The typical serving pressure for most kegs is around 12-14 PSI.
Inspect the pressure relief valve and ensure it's not blocked or malfunctioning. A faulty probe seal can also cause pressure inconsistencies. Replace any worn seals or gaskets. Maintain the CO2 tank by keeping it upright and checking for leaks. Regularly examine all connections and replace any damaged components to maintain consistent pressure.
For detailed guides on installing and maintaining keg couplers, refer to resources like Keg Coupler Care and Connect With Your Beer.
Maintenance and Cleaning
Proper maintenance and cleaning of a keg coupler are essential to ensure smooth operation and prevent contamination. This involves establishing a regular cleaning routine and performing deeper sanitization processes periodically.
Regular Cleaning Schedule
A consistent cleaning schedule is crucial for keeping keg couplers in working order. They should be cleaned after every keg change to prevent residue build-up. Start by disassembling the coupler and removing the check ball retainer. This ensures that all components are thoroughly cleaned.

Prepare a cleaning solution with warm water and a specialized cleaner. Submerge the parts and scrub them using a brush. Make sure to get into all crevices, especially the body and probe.
Rinse all parts thoroughly to remove any cleaning residue. Before reassembling, check for wear and tear on O-rings and seals. Replace any damaged parts to maintain a good seal.
Deep Cleaning and Sanitization
Deep cleaning and sanitization should be done every few months or if the coupler has been in storage. Begin by disassembling all parts, including the check ball retainer, and soak them in a stronger cleaning solution. Follow the recommended ratio on the cleaner's bottle for the best results.
Use a brush to scrub each component individually, ensuring every part is free from dirt and grime. After scrubbing, rinse all the parts in warm water to remove any cleaning residues.
Sanitization involves soaking the parts in a sanitizing solution. This step is crucial to kill any bacteria or yeast that simple cleaning might miss. Once sanitized, allow the parts to air dry completely before reassembling. This ensures no moisture remains that might cause mold or mildew.
Frequently Asked Questions
This section covers common queries about keg couplers, including assembly instructions, components, and compatibility concerns.
How do you assemble a D-type keg coupler?
To assemble a D-type keg coupler, first align the coupler with the locking neck on the kegerator. Turn the coupler clockwise about 25 degrees, then pull out the handle, push it down into the keg valve, and release the handle to lock in place.
What components are included in a keg coupler parts list?
A typical keg coupler parts list includes the handle, body, probe, check ball, and check valve. It also includes washers and seals to prevent leakage. These parts work together to connect the gas and beer lines and ensure proper flow.
How many different types of keg couplers are there, and how are they distinct?
There are six primary types of keg couplers: D, S, A, G, U, and M. Each type corresponds to different keg valves used by breweries around the world. For example, D-type couplers are common for American beers, while S-type couplers are often used for European beers.
What is the procedure for installing a keg coupler check valve?
To install a keg coupler check valve, first, ensure the handle is in the up position. Align and insert the valve into the coupler body. Push down the coupler and twist it to the right until it stops. Ensure it is securely fitted to prevent any gas leakage.
How is a keg structured according to keg parts diagrams?
A keg includes the following parts: the body, which is the main container; the spear or tube, which extends from the valve to the bottom of the keg; and the valve, where the coupler connects. Diagrams often highlight these components to show how the beer flows from the keg to the tap.
When selecting a keg coupler, what are the key considerations for compatibility with different kegs?
When choosing a keg coupler, it is crucial to match the coupler type with the keg valve. For example, use a D-type coupler for most American kegs and an S-type for many European kegs. Consider the type of beer and the keg brand to ensure a proper fit.
Summary
Understanding a keg coupler is essential for anyone using a kegerator. It acts as a bridge between the beer keg and the tap system.
When connecting the coupler, users should first identify the locking neck on the kegerator. Rotating the coupler about 25 degrees clockwise secures it in place. Then, pulling and pushing the handle down locks it into the keg valve.
The coupler has two key ports: the gas in port and the liquid out port. The gas in the port lets CO2 enter the keg from the CO2 cylinder. This pressure pushes the beer out through the liquid outport, ensuring a smooth flow of beer.
Regular maintenance is important. Disassemble the coupler and soak the parts in a cleaning solution, as mentioned in the guide on KegWorks.
Different types of kegs may need different coupler types. Each type connects to specific kegs, making it crucial to choose the right one.
A properly working keg coupler ensures that every pour is perfect. With the right coupler, your kegerator can be a reliable and enjoyable part of any gathering.