Replace Kegerator Lines: Essential Steps for Clean Beer Delivery

Keeping your kegerator lines in top condition is essential for maintaining the taste and quality of your beer. Over time, residue builds up in the lines, which can affect the flavor and freshness. Replacing kegerator lines regularly ensures your beer remains crisp and delicious.
To replace your kegerator lines, you'll need to disconnect the existing lines and attach new ones. This process might seem tricky at first, but with the right steps, it's straightforward and ensures a better drinking experience. Follow this simple guide to learn about replacing your kegerator lines effectively.
Key Takeaways
- Regularly replacing kegerator lines maintains beer quality.
- Disconnect old lines before attaching new ones.
- Proper line maintenance ensures a better drinking experience.
Understanding Kegerator Systems
Kegerator systems are essential for serving draft beer at home or in the commercial environment. They consist of several components that work together to keep the draft beer system both fresh and cold. Key parts include the kegerator, beer lines, tap, faucet, and keg coupler.
Components of a Kegerator
Kegerator
A kegerator is a specialized refrigerator designed to store and dispense kegs of beer. Its primary function is to keep the beer at an optimal temperature.

Beer Lines
Beer lines transport beer from the keg to the tap. Over time, these lines can collect residue, so they must be either cleaned regularly or replaced regularly.

Tap and Faucet
The the tap handle and faucet are the external parts you interact with to pour beer. Ensuring these are clean is crucial for maintaining beer quality.

Keg Coupler
A keg coupler connects the keg to the kegerator's draft system. It allows the gas to enter the keg and the beer to exit. Different types of couplers are used for different beer styles.

Draft System
This system includes the beer line, gas, beer line cleaner, and tap, working together to ensure a smooth pour.
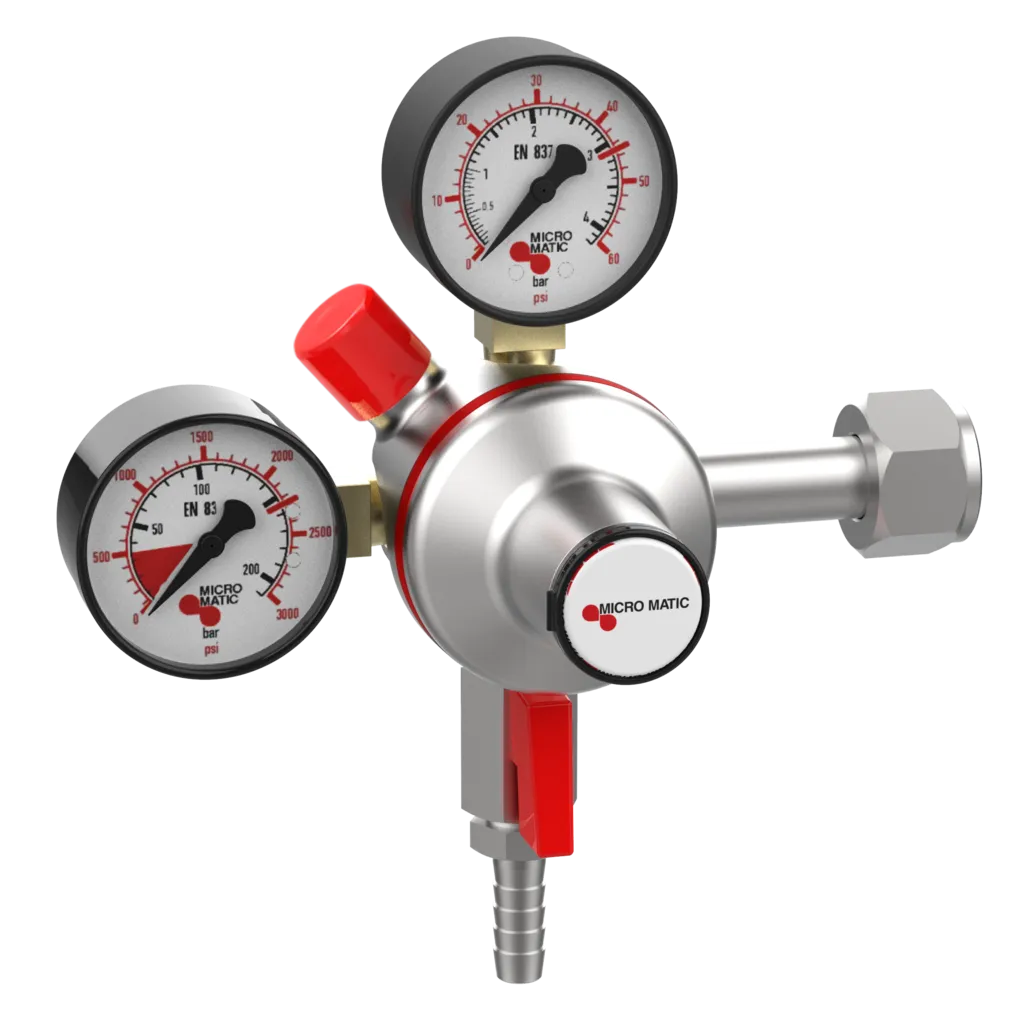
Gas Line and Regulator
The gas line connects the CO2 tank to the keg coupler. The regulator controls the gas pressure, essential for proper carbonation.

CO2 Tank
A CO2 tank provides the necessary pressure to push beer from the keg to the tap. The size of the tank can vary based on individual needs.
Beer Tower
In some kegerators, the beer tower houses the tap and faucet. It can be mounted on a counter or integrated into the kegerator. Proper insulation helps maintain beer temperature during dispensing.
These components must work together efficiently for a successful draft beer experience at home.
Recognizing the Need for Replacement
To keep beer tasting fresh, it’s important to know when to replace the kegerator lines. Aging lines can cause wear and tear or lead to contamination and off-flavors.

Identifying Wear and Tear
Kegerator lines can degrade over time. Check for visible signs such as cracks, discoloration, or stiffness. These indicate that the lines are old and need to be replaced.
Old beer residue can build up within the lines, leading to blockages or slow pours. Be on the lookout for debris or sediment inside the tubing. If cleaning the lines does not clear these issues, replacement is necessary.
Beer stone or calcium deposits can also form on the insides of the lines. Look for white or grayish film, which cleaning might not thoroughly remove.

Detecting Contamination and Off-Flavors
Contaminants like mold, bacteria, or yeast can grow inside the lines. They contribute to poor hygiene and could be harmful. If you notice unusual floating particles or growth inside the tubing, this is a sign of contamination.
Off-flavors in beer can result from bacterial or yeast growth. These flavors might include sour, metallic, or musty notes. If thorough cleaning doesn't fix these off-flavors, it’s time to change the lines.
Another sign of contamination is unpleasant smells coming from the lines, indicating the presence of mold or other contaminants. Ensure lines are replaced promptly to maintain the purity and taste of the beer.
Preparation for Replacement
To replace kegerator lines properly, it's important to have the right tools and understand the steps to safely disassemble the current setup. This will ensure a smooth replacement process and help avoid unnecessary problems.
Gathering Necessary Tools
Start by collecting all the tools and materials you will need. This typically includes:
- Hex wrench: For unscrewing parts of the kegerator.
- Screwdriver: Various types might be needed, such as Phillips or flat-head.
- Faucet wrench: Useful for loosening and tightening faucet nuts.
- Cutters: To cut old beer line.
- Hose clamps: These clamps secure the new lines.
- Bucket or container: Needed for catching any liquid during disassembly.
- Replacement kit: Contains new beer lines and possibly other needed parts.
Prepare a clean, well-lit workspace. This will make it easier to see small parts like nuts and washers, reducing the risk of losing them. Having all tools within reach will make the process quicker and smoother.
Disassembling the Current Setup
First, disconnect the keg coupler from the keg. This will stop the flow of beer and prevent spills. Next, unscrew the faucet from the shank using a faucet wrench. Remove any washers and set them aside for reassembly.
Then, use a hex wrench to unscrew and pull the shank from the beer line. Once the shank is free, you can remove the beer line from the kegerator. It may be helpful to have a bucket or container nearby to catch any remaining liquid in the lines.
Check if hose clamps are securing the lines. If so, use a screwdriver or appropriate tool to loosen and remove these clamps. Carefully peel off the old lines, ensuring you do not damage other components. You may need to use a set of oetiker pliers if oetiker clamps were used.
Once disassembled, clean the entire area to ensure a clear setup space for the new lines, checking all parts for wear and tear, replacing any worn-out items before proceeding.
Executing Line Replacement
Replacing kegerator lines involves removing old lines from the system and installing new lines correctly. Follow these steps to ensure your kegerator maintains optimal performance and clean beer flow.
Installing the New Lines
To install new beer lines, measure the correct length and inside diameter of the tubing to fit your system. Standard beer lines usually have a 3/16" inside diameter. Attach one end of the new line to the shank. Secure it using a stepless clamp or another clamp method to ensure no leaks. A 4' piece is usually best for standard kegerators.
Next, attach the other end of the line to the tap coupler. Again, use a clamp to secure the connection. Once both ends are connected, reassemble the shank and faucet handle onto the kegerator. Finally, reconnect the keg coupler to most kegerators, turn on the CO2 pressure, and check for leaks by running beer through the lines. If there are no leaks, your new lines are ready to use. Set the Primary Regulator to 12 PSI.
Cleaning and Maintenance
Regular cleaning and preventive maintenance of kegerator lines are essential to keep your beer tasting fresh and prevent contamination. These efforts will also help extend the life of your kegerator system.
Proper Cleaning Techniques
To maintain the quality of your beer, kegerator lines should be cleaned with a beer line cleaner. Turn off the CO2 tank and regulator before starting. Disassemble the tap faucet and connect the line to a cleaning keg or pump filled with the cleaning solution.
Pump the solution through the lines using a hand pump. This will dislodge any sediment or mold buildup inside the lines.
After running the solution through, rinse the lines with cool water to remove any residue. Test the water with PH paper to ensure all the chemicals are completely out of the system.
- Use a beer line washer between the shank and the connector.
- Clean your lines every 2 weeks if the kegerator is in heavy use.
Preventive Maintenance Measures
Preventive maintenance includes regularly inspecting the kegerator lines for wear and tear. Over time, lines can become old or clogged, which affects beer quality.
Replace lines if they appear discolored or have a strong off-smell even after cleaning. Regularly check the CO2 tank and regulator for leaks. Replace any worn-out washers or connectors to prevent gaps where contaminants could enter the system.
Periodically sanitize the exterior surfaces of the kegerator, taps, and faucets with a sanitizer. Clean spills immediately to prevent mold growth. Maintaining an organized setup and keeping a consistent cleaning schedule will ensure your kegerator system operates smoothly.
Frequently Asked Questions
In this section, we answer common questions about replacing kegerator lines, including how often to replace them, the necessary steps for different types of kegerators, and proper cleaning methods.
How often should kegerator lines be replaced for optimal performance?
Kegerator lines should be replaced every 6-12 months. Regular replacement ensures that old beer residue doesn't affect the taste of new beer. If the lines show signs of buildup replacing beer, or if there's frequent usage, consider replacing them every 6 months.
What are the necessary steps to change the beer line in a tower kegerator?
First, disconnect the keg coupler and remove the faucet from the shank. Next, unscrew the shank from the beer line. Remove the beer line from the kegerator. Replace the beer in it with a new line and reattach everything in reverse order.
What is the ideal length for kegerator lines to ensure proper beer flow?
The ideal length for kegerator lines is typically around 4-5 feet using 3/16 i.d lines. Too short a line can cause foaming issues, while too long a line might result in foaming issues too. Adjust the length based on your specific equipment and beer type.
When removing a beer line from a coupler, what is the correct procedure to prevent leaks or damage?
Disconnect the beer line carefully by unscrewing it from the coupler. Use the appropriate tools to avoid stripping the connections. Make sure to turn off any gas lines first to prevent pressure issues. Follow the steps precisely to avoid damage.
Summary
Replacing kegerator lines is essential to maintain the quality of your own beer too.
First, disconnect the empty keg coupler from the keg. This prevents any beer flow and makes the process safer.
Next, unscrew the faucet from the shank. This allows you to remove the shank from the beer line.
After that, detach the beer line from the kegerator. This clears the way for installing new lines.
To install new beer lines, simply reverse the steps. Attach the new beer line to the kegerator, then screw the shank back onto the replacing beer line.
Next, reattach the faucet to the shank. Ensure all connections are tight to avoid leaks.
Lastly, reconnect the keg coupler to the keg. This completes the process and readies your kegerator for use.
For more detailed guidance, you can refer to this step-by-step guide or another comprehensive guide.
Regularly replacing kegerator lines can prevent build-up. This ensures that your beer stays fresh and clean-tasting.


